Marketing Cloud Next (Growth and Advanced Edition) gives you the workspace for building, personalizing, and publishing content across email, SMS, and WhatsApp.
As Marketing Cloud experts, we’re currently building email campaigns in Marketing Cloud Next.
This guide walks you through the full content creation process, from setting up your brand and assembling an email using the drag-and-drop builder, to configuring subject lines, running test sends, and meeting CAN-SPAM requirements before you publish.
Marketing Cloud Next: Content creation
1. Select a brand for your content
When creating new content in Marketing Cloud Next, the first thing you’ll notice is the “Select Brand” button on the right-hand side.
This feature applies predefined company brand standards like colors, fonts, button styles, brand identity, and tone, directly to your email content. Since brand configuration is a prerequisite, make sure your brand has been created and configured before moving into content creation.

Since the brand has already been created above, let’s now move forward with content creation.
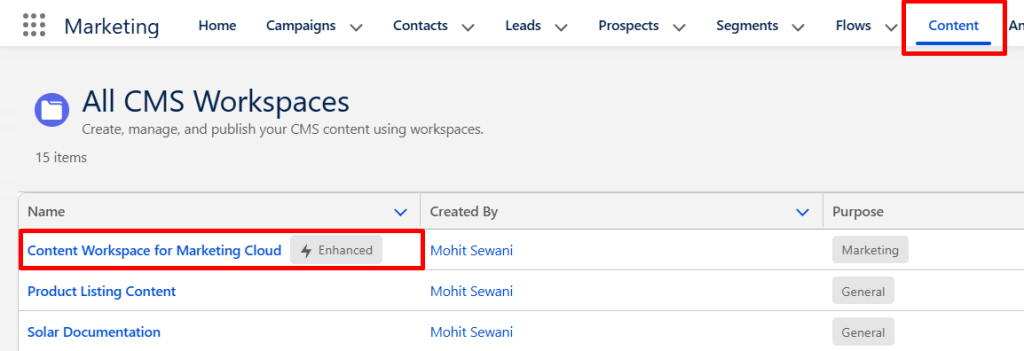
2. Open the Content tab
Opening the Content tab lands you inside the Content Workspace, which serves as your central hub for all marketing assets. From here, you can create and manage:
- Email content
- SMS and WhatsApp messages
- Media files like images and PDFs
- Reusable content blocks
If you’ve worked with Marketing Cloud Engagement, the experience will feel somewhat familiar. That said, the Next platform introduces tighter integration with data and personalization, making content creation more dynamic and scalable than what you may be used to.
3. Creating content in Marketing Cloud Next
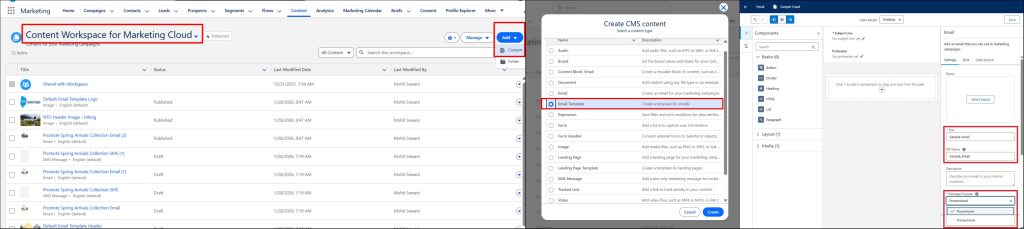
Let’s walk through how content is actually created inside the platform. It’s a 3-step process:
- Click the Add button. From the dropdown menu on the far right, select Content. This opens the asset creation flow where you choose the type of content you want to build.
- Choose content type. Your options include Email Templates, SMS & WhatsApp messages, Forms & Landing Pages, and supporting media assets like images or PDFs. For this walkthrough, select Email Template and click Create. (The template can be reused later.)
- Enter the required information. Before designing, you’ll need to fill in the Email Name, the API Reference Name, and the CAN-SPAM Classification (Promotional or Transactional).
Here are the images of the steps in the order of the bullets above.
Content builder components in Marketing Cloud Next
Before you start designing your email, it’s important to understand the building blocks available in the editor. Marketing Cloud Next uses a drag-and-drop builder with modular components.
The builder is organized into three categories, Basics, Layout, and Media components.
| Category | Component | Functionality |
| Basics | Button | Lets you create CTAs with redirection links. |
| Divider | Used for visually separating sections. | |
| Heading | Applies predefined brand styles automatically. | |
| HTML | Allows you to paste raw source code directly. | |
| List | Supports bullet-point or numbered lists. | |
| Paragraph | Used for standard body text typed directly onto the canvas. | |
| Layout | Section | Typically placed first; controls column structure. Enabling “Stack columns on mobile” arranges content vertically on smartphones. |
| Repeater | Connects to a data source and renders multiple items using a single structured layout. Brings the dynamic display functionality of AMPscript’s LookupOrderedRows into a more intuitive UI-based experience. | |
| Content Block | Allows you to define, save, and reuse blocks across emails. | |
| Media | Image | Supports CMS-managed images, captions, URL links, and dynamic content configuration directly from the panel. |
The Button component allows you to assign either Salesforce CMS content or any URL to the button action. Just as you can create conditional variations for subject lines, you can do the same for CTA links, so the destination URL changes based on defined conditions.
4. Set subject line & preheader
The platform offers several personalization options for subject lines and preheaders. Einstein AI (see below) can generate subject line suggestions to help improve engagement.
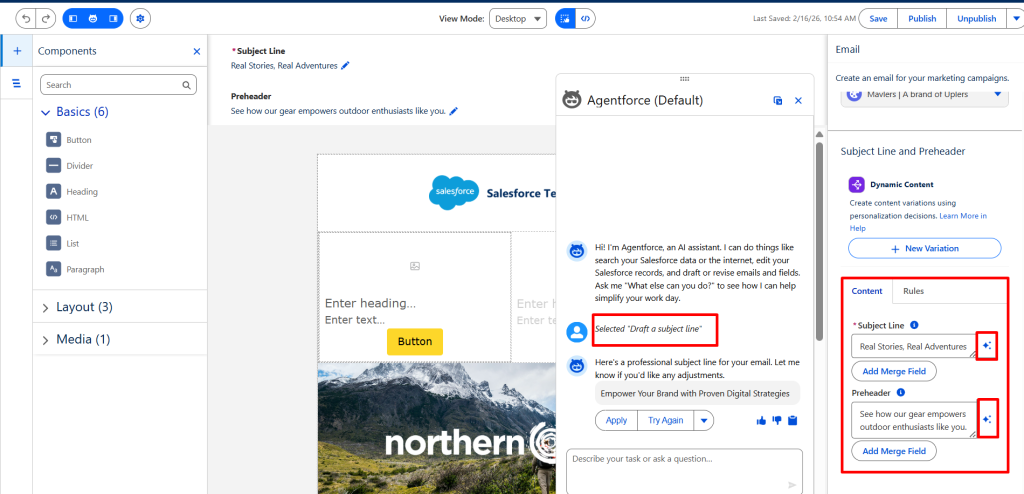
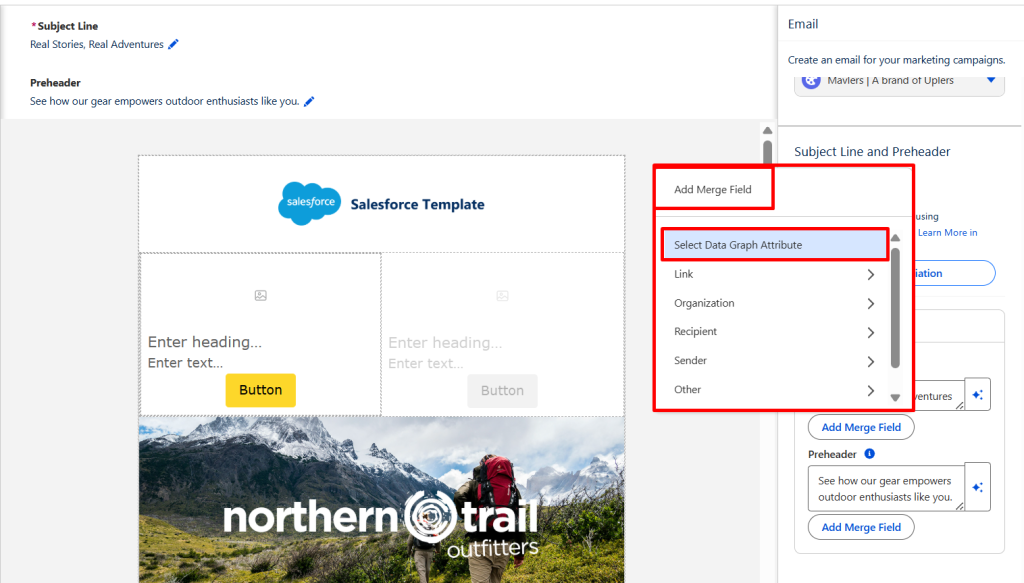
You can also insert merge fields, such as a recipient’s name or other profile attributes from a Data Graph, directly into the subject line as shown below.
For deeper personalization, you can create conditional variations:
- In the subject line space, select “Create New Variation.”
- Give the variation a name.
- Under “Take action when,” define the conditions that should trigger this variation; it could be a customer’s loyalty tier or a profile attribute from a Data Graph.
- Save the variation.
If multiple conditions match a recipient, the variation with the highest priority is delivered. But if no conditions match, the default subject line is used as a fallback.
Here are the images of the steps in the order of the bullets above.

After designing and configuring your content, it’s time to test how it’s going to render.
5. Preview & test send
Before publishing, use the Preview and Test Send feature to verify that the email content renders correctly. It has two phases:
- In the preview phase, you select a single unified individual as the sample recipient. Using that individual’s data, you can view the email on-screen to confirm that personalization and dynamic content render as expected.
- Once previewing is complete, the test send phase lets you use the sample recipient’s data to send the email to up to five real email addresses.
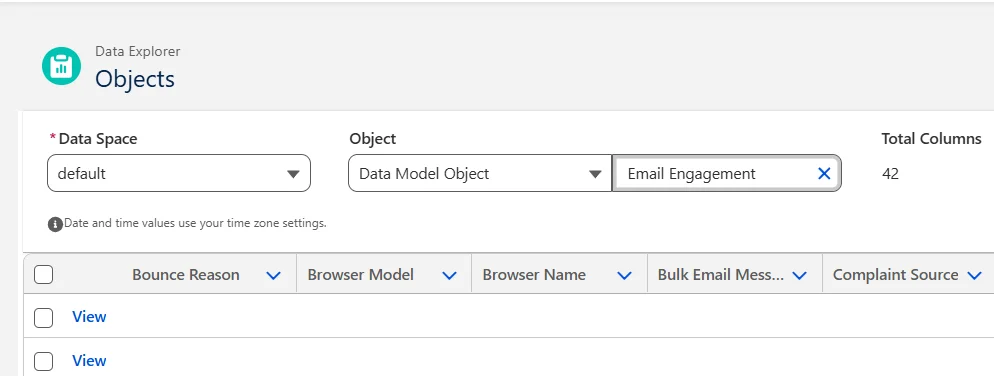
Note that each test send is recorded in both “MessagingEventsEmail — EmailEngagement” (DLO) and “Email Engagement” (DMO), so test records will appear alongside production data if you aren’t filtering by send type.
More often than not, it is because of some miscarriage in the preview and testing phases that a perfectly set-up campaign tanks just after, directly impacting your ROI.

Important note on CAN-SPAM classification
When you’re sending promotional emails, two compliance requirements apply:
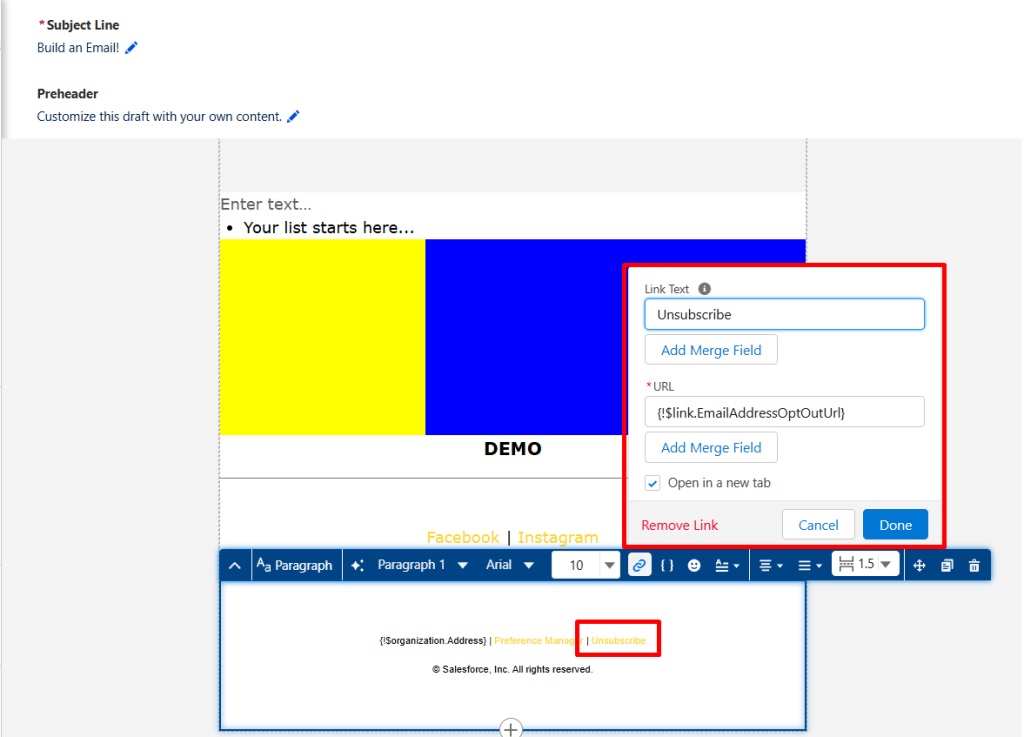
- A physical address placeholder is required. Use {!$organization.Address}; if the physical address is not set, an error will occur and sending will be blocked.
- Verify whether or not the unsubscribe link is working correctly.
While an unsubscribe URL is legally mandatory under CAN-SPAM, the platform will not throw a validation error if one is missing. This is because some companies use custom unsubscribe URLs. As a result, it is your responsibility to confirm that a working unsubscribe link is present before every send. Do NOT rely on Marketing Cloud’s validation to catch this.
6. Save & publish
Once content creation, preview, testing, and compliance checks are complete, click Save and then Publish to make the content available for use in your campaigns.
Getting started with content creation in Marketing Cloud Next
Creating content in Marketing Cloud Next, whether for email, SMS, forms, or landing pages, is no rocket science after all. However, the critical takeaway is the handling of the unsubscribe link. It underscores a common temptation marketing teams encounter when working with sophisticated platforms like Salesforce Marketing Cloud, and that is: over-reliance on the system.
The advanced AI layer reinforces the templation.
Your responsibility increases now that AI and agents have entered the mix. The more vigilant you are, the more effective and compliant your campaigns will be.