
As teams grow and content production speeds up, it’s easy for things to drift: colors get tweaked, messaging shifts, and campaigns start to feel disconnected.
Over time, that inconsistency chips away at trust.
That’s why you need brand guidelines. They act as a shared foundation, keeping every email, campaign, and piece of content aligned. Brand identity is the foundation of your business.
In this guide, our Salesforce Marketing Cloud experts walk you through the steps for setting up brand guidelines in Marketing Cloud Next. Let’s get started.
Steps for setting up brand guidelines in Marketing Cloud Next
Before you begin, make sure the following are in place:
- You have access to Content Workspace
- You have permissions to create and publish brand assets
Now, let’s get started with the steps.
1. Create a brand
Defining a clear brand identity and tone matters because this metadata is what helps Einstein generate text that’s grounded in your company’s actual personality. Let’s start by creating a new brand asset:
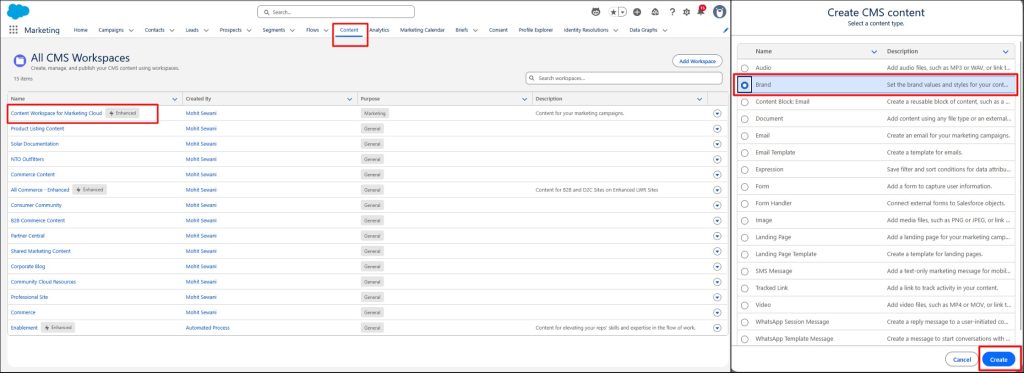
- Search for Marketing from the App Launcher.
- Select the Marketing App (identified by a gray icon).
- Select the Content tab.
- Select Content Workspace for Marketing Cloud from the list view.
- From the workspace, click the blue Add button and select the Content menu option.
- Select the Brand radio button, then click Create.
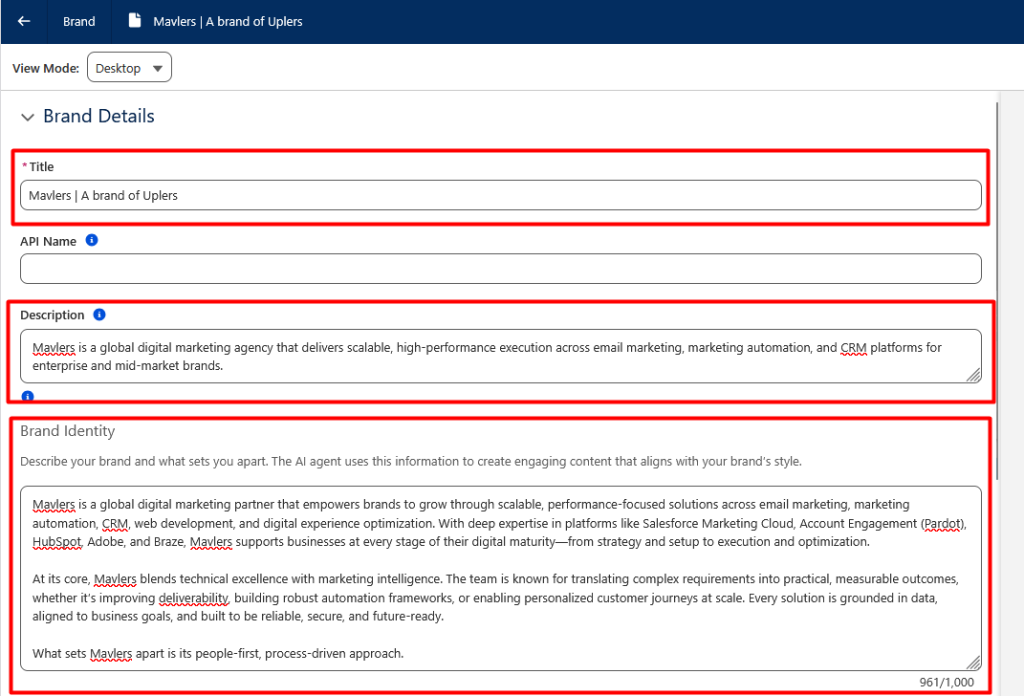
2. Fill in the brand details
With your new brand draft open, you’ll fill in several fields that together define who your brand is. Work through each one below.
Title
In the Title field, enter your brand name.
Description
The Description field is a short summary of what your brand does.
Brand identity
The Brand Identity field is where you paint the full picture: your mission, what sets you apart, the kind of community you build, and the values you stand for. This is the richest input Einstein will use when generating content on your behalf, so make it count.
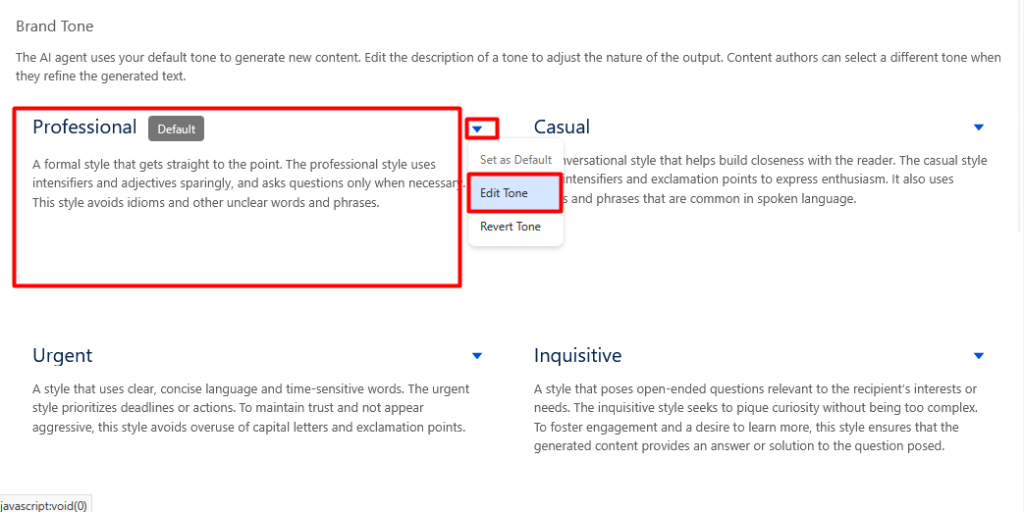
3. Define your brand tone
Brand tone tells Einstein how to say what it needs to be said. So a well-written tone description makes a real difference in the quality and consistency of AI-generated copy.
In the Brand Tone section, find the Professional tile and select Edit Tone from its menu. Copy the description below into the text area, then click Done.
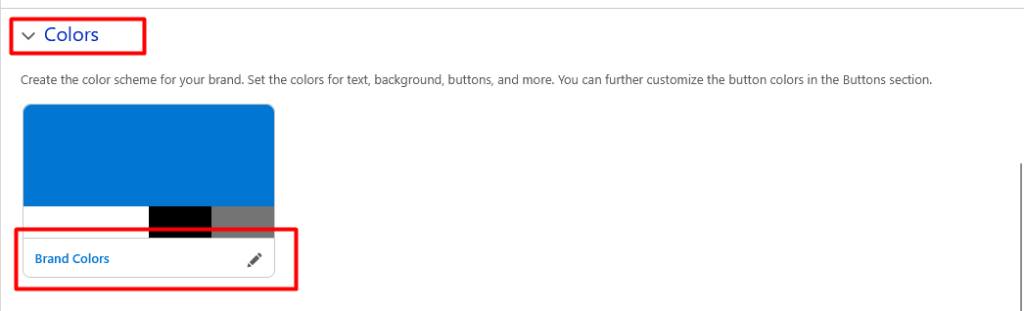
4. Configure brand colors
Colors are one of the most immediate signals of brand identity. So here’s how to set your brand’s accent color:
- Click on Colors to expand the section.
- Click the pencil icon inside the Brand Colors tile.
- Update the Accent value.
- Optionally, adjust any other formatting options as needed.
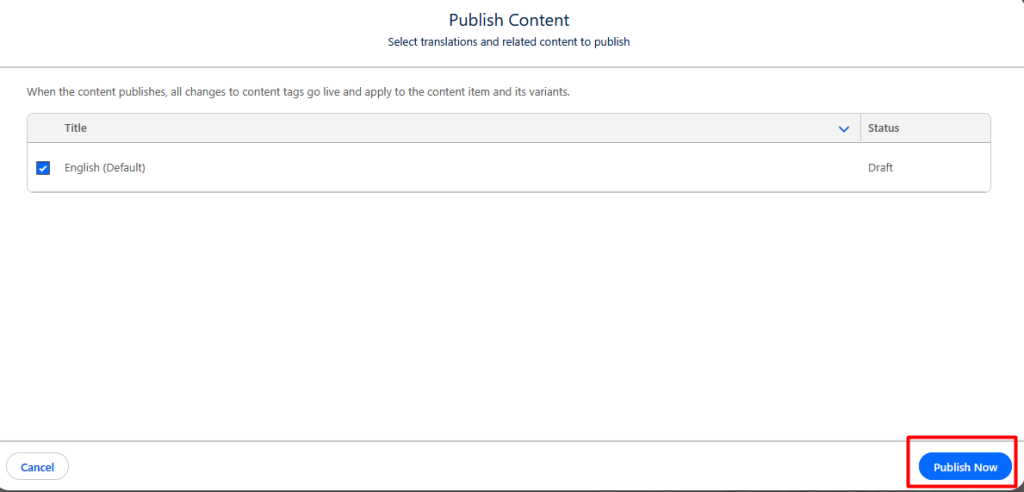
5. Save and publish
Once all your brand details are in order, it’s time to save your work and make it live.
- Click Save at the top of the page.
- Click Publish, then select Publish Now.
- Click the back arrow in the top-left corner to return to the Content page.
6. Assign the brand as default
Publishing your brand is only half the job.
To make sure it actually applies across your workspace, you need to set it as the default brand. This ensures that all Agentforce Marketing content inherits your brand’s settings automatically, though you can always create additional brands for specific campaigns, events, or product lines.
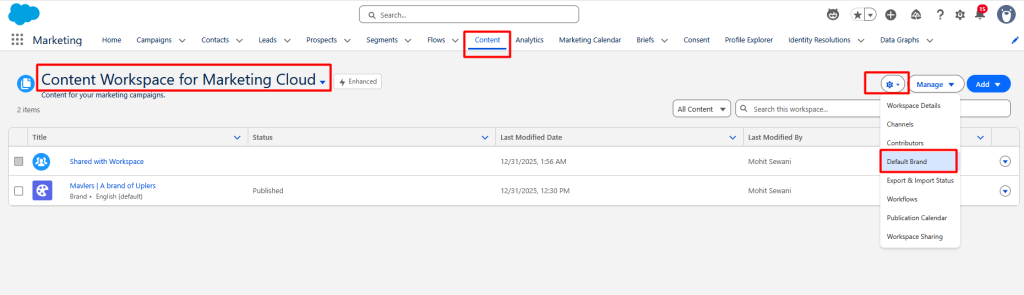
- Click the Content tab and select Content Workspace for Marketing Cloud from the list view.
- Click the gear icon and select Default Brand from the menu.
- Click Select Brand.
- Select the radio button for your brand and click Add.
- Click Save.

Getting started with Salesforce Marketing Cloud Next
Leveraging brand settings allows you to standardize the appearance and tone of your content, improving consistency and efficiency, especially when reusing similar designs frequently.
Before we close, an important note: Once content has been published, updating the associated brand settings will not automatically update the published content. This behavior is consistent with Marketing Cloud Engagement. To apply updates, you must first unpublish the content and then republish it.