So, if you’ve ever run a Shopify store and a WordPress site side by side, you already know what I’m about to say; they don’t hate each other, well, they just don’t talk much.
Shopify’s the powerhouse running your e-commerce engine, replete with secure payments, a slick checkout, and the inventory that never forgets.
WordPress, meanwhile, is that endlessly creative friend who loves to tell stories, show off, and make Google very, very happy.
But when you try to get them to play nice, when you say, “Hey, I just want to show my Shopify products in my WordPress blog, is that so hard?” the internet suddenly turns into a maze of plugins, embeds, and half-baked tutorials.
I’ve been there. More times than I care to admit.
So here’s the deal: with 13+ years of rich & varied & expertise in the web dev arena, we are going to break down how to display your Shopify products directly inside WordPress, without blowing up your theme, tanking your site speed, or making your marketing team cry.
We’ll cover three battle-tested methods from quick embeds to full-blown API wizardry, and I’ll tell you when each is worth the hassle.
Let’s get to it.
Why would you want to do this in the first place?
Well, simply because you probably want the best of both worlds!
Maybe your store’s built on Shopify (because, duh, it’s reliable and gorgeous out of the box), but your blog or landing pages live on WordPress because that’s where your marketing magic happens.
You could migrate your entire site to Shopify, but if you’ve already invested years building a content-rich WordPress site, that’s like burning down your house because you don’t like the kitchen.
So instead, you choose to connect the two:
~ Shopify runs the commerce backend (products, checkout, inventory).
~ While WordPress runs your storytelling, SEO, and design.
And together, they create a seamless brand experience where a reader can go from reading your story to buying your product in two clicks flat.
Let’s now get down to how to integrate the two seamlessly.
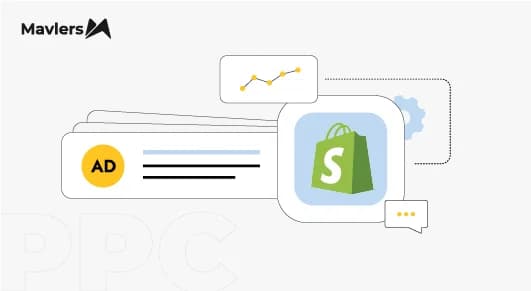
Method 1: The Shopify “Buy Button” embed, AKA the easy button
So, if you would rather dip your toes into this integration thing without touching a single line of code, the Shopify Buy Button is your gateway drug.
You may think of it like an iframe that carries your Shopify product wherever you want, your blog, your landing page, even your grandma’s WordPress recipe site (if she’s into drop shipping). 😉
Here’s how it works;
Step 1: Add the Buy Button channel
Go to your Shopify admin → Settings → Apps and sales channels → Add sales channel → Buy Button.
Voils! You’ve just added a tiny e-commerce teleportation device.
Step 2: Create a Buy Button
Now open the Buy Button section → Create a Buy Button. Next, you gotta pick a product or collection you want to showcase.
Shopify gives you options to:
- Choose layout (grid, list, or single product).
- Match button color and text with your site.
- Decide what happens when someone clicks (e.g., add to cart, go to checkout, open a modal, etc.).
Click Generate Code, and Shopify spits out a snippet of HTML/JS that looks deceptively harmless.
Step 3: Paste it in WordPress
In your WordPress post or page, switch to the HTML view, paste that code, and hit Update.
Lo & behold! Your Shopify product now lives inside your WordPress page. Fully functional “Add to Cart” button included.
Here’s why devs love it!
~ Zero API setup.
~ Works instantly.
~ No plugin bloat.
And here’s why sometimes they don’t;
~ The styling sometimes looks like it wandered in from another planet.
~ It doesn’t dynamically sync inventory or product updates (you’ll need to regenerate the code if you make changes).
Still, if you just want to sprinkle a few “Shop Now” buttons in blog posts or feature a small catalog on a WordPress homepage, this is your quickest win.
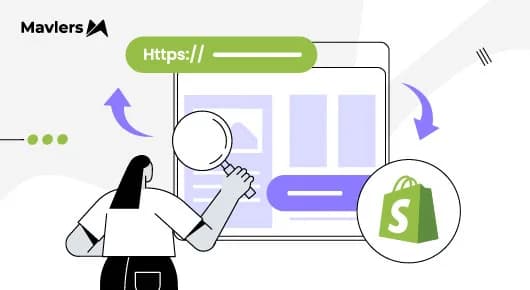
Method 2: Taking the plugin route
Alright, maybe you’re not into pasting snippets like it’s 2005. You want something that feels native in WordPress, loads live data, and maybe even supports shortcodes.
On that note, welcome to the plugin route.
Plugins like WP Shopify and EmbedShop basically act as translators between your Shopify store and your WordPress front end. They use Shopify’s Storefront API behind the scenes to dynamically pull product data.
That means your product titles, prices, and images auto-update whenever you change them in Shopify.
Here’s how to take this route like a pro;
- Head to WordPress → Plugins → Add New.
- Search for WP Shopify (free) or EmbedShop (premium).
- Install and activate the one that suits your needs.
- Connect your Shopify store using an API Key and Storefront Access Token. (You can get these from Shopify under Settings → Apps and sales channels → Develop apps.)
- Configure how you want products displayed: via Gutenberg blocks, shortcodes, or widgets.
And, done! You’re now pulling live Shopify data straight into WordPress, with zero code.
Want to know the perks of this approach? Here are some tried & tested ones;
~ Your store syncs automatically.
~ You can style it within WordPress.
~ No need to regenerate code every time you update a product.
You might also want to know its downsides.
~ Adds plugin weight (and occasional conflicts).
~ Not all free plugins support advanced features like cart drawers or filtering.
~ Some premium ones (like EmbedShop) are totally worth it if you want polished grids and sliders.
To surmise, if you’re a marketer or small biz owner who wants a living, breathing Shopify catalog in WordPress without writing a single line of code, plugins can very well be your happy middle ground.
Method 3: Say yay to the API way!
Okay, this is where we put on the dev gloves.
If you’ve ever muttered, “I could just build it myself,” congratulations, this one’s for you.
Shopify’s Storefront API lets you fetch live product data and render it any way you want inside WordPress. One can think of it as Shopify’s secret backdoor for developers.
You can use it to:
~ Build a custom product gallery.
~ Create dynamic product grids that auto-update from Shopify.
~ Run a fully headless or hybrid setup where Shopify serves as the backend and WordPress as the frontend.
Step 1: Create a custom app in Shopify
Go to your Shopify admin → Settings → Apps and sales channels → Develop apps for your store.
Create a new app and generate a Storefront API access token.
Keep that token safe because it’s your key to the kingdom.
Step 2: Fetch products via the API
Here’s a simple PHP example (yes, you can also do this in JS if you’re feeling fancy):
| $shopify_domain = ‘your-store-name.myshopify.com’;$access_token = ‘your-storefront-access-token’; $query = ‘{ products(first: 5) { edges { node { title description images(first: 1) { edges { node { src } } } onlineStoreUrl } } }}’; $response = wp_remote_post(“https://$shopify_domain/api/2024-04/graphql.json”, [ ‘headers’ => [ ‘Content-Type’ => ‘application/json’, ‘X-Shopify-Storefront-Access-Token’ => $access_token ], ‘body’ => json_encode([‘query’ => $query])]); $body = json_decode(wp_remote_retrieve_body($response), true); foreach ($body[‘data’][‘products’][‘edges’] as $product) { $p = $product[‘node’]; echo ‘<div class=”product”>’; echo ‘<img src=”‘ . esc_url($p[‘images’][‘edges’][0][‘node’][‘src’]) . ‘” />’; echo ‘<h3>’ . esc_html($p[‘title’]) . ‘</h3>’; echo ‘<p>’ . esc_html($p[‘description’]) . ‘</p>’; echo ‘<a href=”‘ . esc_url($p[‘onlineStoreUrl’]) . ‘” target=”_blank”>View Product</a>’; echo ‘</div>’;} |
Now, your WordPress page will dynamically pull and render Shopify products without any manual embed or stale data.
Add a touch of CSS and it’ll look native to your theme:
| .product { border: 1px solid #eee; padding: 15px; margin: 20px 0; text-align: center; border-radius: 10px;}.product img { max-width: 100%; border-radius: 8px;}.product h3 { font-size: 1.2rem; margin-top: 10px;} |
Let’s now look at some reasons why devs love it;
~ It’s fast, flexible, and future-proof.
~ Perfect for headless builds.
~ You can hook it up with automation or caching layers.
And here are some reasons why they don’t;
~ You’ll need to handle rate limits and error states.
~ If Shopify changes API versions (which they often do), you’ll need to stay up to date.
Still, this is the method we use for high-performance sites where control, SEO, and scalability all matter.
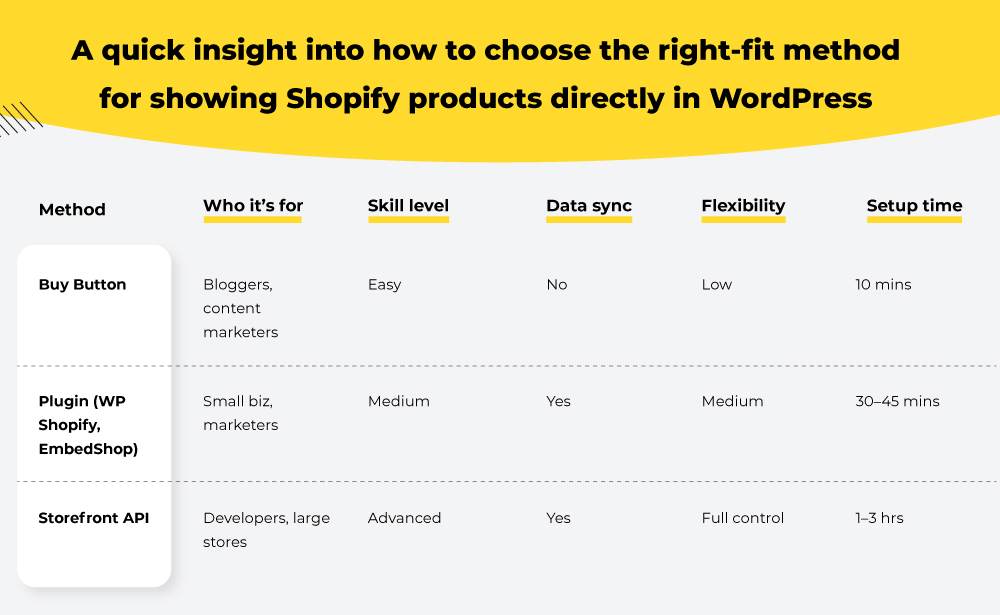
Figuring out which method might suit you best
Wondering which road to embark on in your quest for integrating Shopify products directly into WordPress? Here’s a quick download on making a sane, well-thought-out decision.
The road ahead
On that note, if you have been on the fence over creating a blog for your Shopify store, here’s a read you might wanna look into next ~ Why Your Shopify Store Needs a Blog and How to Set It Up.